How to Grow Bell Peppers in Your Home Garden
Bell peppers are one of the most rewarding vegetables to grow at home—colorful, versatile in the kitchen, and far superior in flavor to grocery store peppers that were picked green and shipped thousands of miles. They’re a natural next step once you’ve mastered easier crops from our list of the best vegetables to grow at home. The trick to growing excellent bell peppers is understanding their needs: they love heat, dislike cold, and take patience to reach their full color potential.
Understanding Bell Pepper Growth
Bell peppers (Capsicum annuum) are warm-season perennials grown as annuals in most of North America. A few key facts shape everything about how you grow them:
- Slow starters: From transplant to first harvest is 70–90 days—much slower than tomatoes or cucumbers
- Heat-lovers: Fruit set is best between 70–85°F; above 90°F and below 55°F, flowers drop without setting fruit
- Color development: Green peppers are immature. Red, yellow, orange, and purple bells are the same pepper at full maturity—left on the plant 2–4 more weeks to develop sugars and color
- Sweet vs. spicy: All bell peppers are sweet (zero Scoville units); they lack the capsaicin gene
Varieties to Choose
Classic bell peppers:
- California Wonder: Traditional green-to-red; reliable producer
- King of the North: Excellent for short, cool seasons (Northeast, Northwest)
- Keystone Resistant Giant: Large, blocky fruit; good disease resistance
Colored bells (worth growing):
- Chocolate Beauty: Deep brown when ripe; rich, sweet flavor
- Golden California Wonder: Yellow when ripe
- Orange Sun: Bright orange at maturity
- Purple Beauty: Deep purple, turns red at full maturity
Italian frying peppers (elongated, mild):
- Corno di Toro, Jimmy Nardello—not technically bell peppers but grown the same way; earlier and more productive
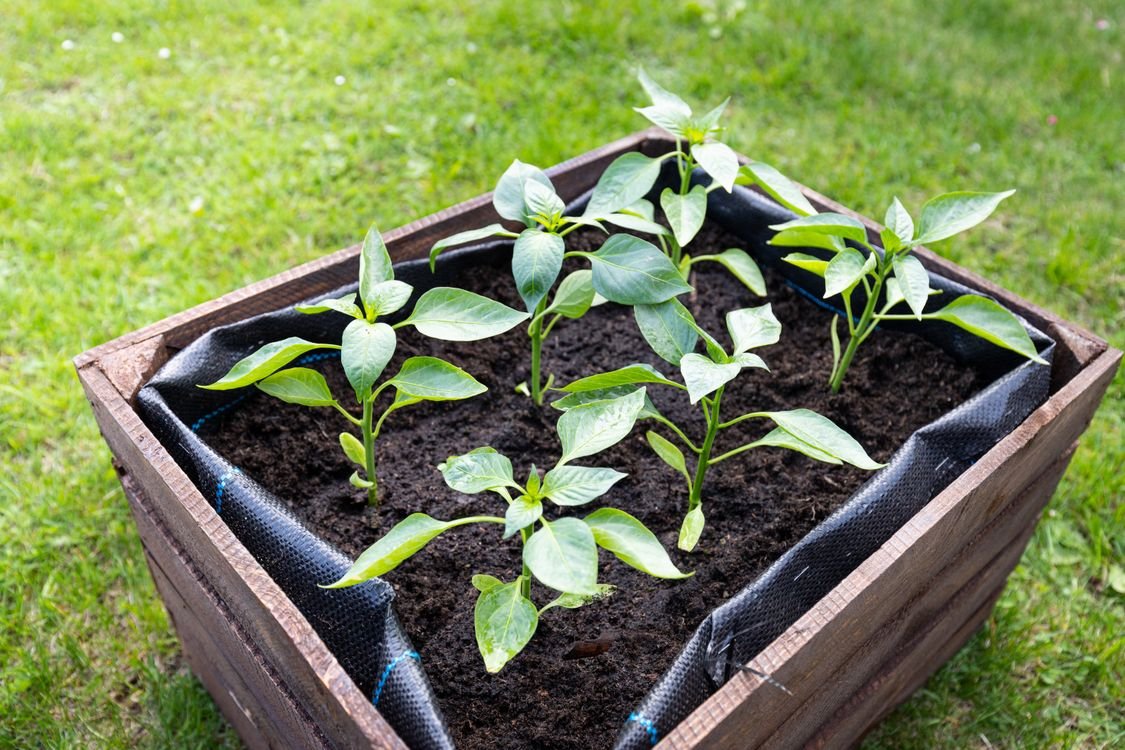
Starting Seeds vs. Buying Transplants
Bell peppers take 10–12 weeks from seed to transplant-size seedlings—making them one of the earliest seeds to start indoors (January or February in most of the US).
Starting from seed:
- Use a heat mat (75–85°F soil temperature) for germination; pepper seeds germinate poorly in cool soil
- Germination takes 10–21 days
- Provide 14–16 hours of light under grow lights for strong seedlings
- Transplant size: 3–5 inches tall with 4–6 true leaves
Buying transplants: The easiest option for most homeowners. Buy stocky, dark green transplants from a nursery when timing is right.
Do not plant too early: This is the most common pepper mistake. Cold soil (below 60°F) stunts pepper roots for weeks. Better to wait 2 weeks than to plant in cold soil.
Planting Bell Peppers
When to Plant
- After all frost danger has passed
- When soil temperature is 65°F or above (70°F ideal)
- Nighttime temperatures consistently above 55°F
In most climates: Mid-May to early June for transplants.
Where to Plant
Full sun (8+ hours): Absolutely essential. Peppers fail in shade or partial shade. Sheltered location: Peppers dislike wind; a south-facing bed or wall-protected location traps heat and improves production.
Soil Preparation
Peppers thrive in:
- Rich, well-draining soil
- pH 6.0–6.8
- High organic matter
Prepare beds with 3–4 inches of compost worked 12 inches deep. Add a balanced slow-release fertilizer at planting. If you’re growing in raised beds, our guide to the best soil for raised vegetable garden beds will help you build an ideal mix from the start.
Tip: Warm your planting bed with black plastic mulch 2–3 weeks before transplanting. Peppers in pre-warmed soil establish and produce dramatically faster. Raised beds are ideal for this—if you haven’t built one yet, our guide on how to build a raised garden bed is the place to start.
Planting
- Dig a hole slightly deeper and wider than the root ball
- Gently loosen the root ball if root-bound
- Set so the plant is at the same depth as in the pot (unlike tomatoes, don’t bury the stem)
- Firm soil around roots and water deeply
- Space 18–24 inches apart; rows 24–30 inches apart
Apply 2–3 inches of mulch around plants after soil warms. Black plastic mulch is excellent for peppers—it retains heat and moisture simultaneously.
Watering Bell Peppers
Consistent moisture is crucial for pepper quality and production.
Water requirements: 1–1.5 inches per week; more during heat waves.
Consistency matters: Irregular watering causes blossom-end rot (calcium deficiency) and flower drop. Peppers need steady moisture, not alternating drought and flood.
How to water: At the base of plants; keep foliage dry to reduce disease. Drip irrigation is ideal.
Water stress signs: Wilting and dropping flowers or small fruits indicate water stress. Water immediately and maintain consistent soil moisture going forward.
Fertilizing Bell Peppers
Peppers are moderate feeders—they need nutrition but don’t want to be overwhelmed with nitrogen.
At planting: Balanced slow-release fertilizer (10-10-10 or similar) mixed into the planting hole.
During vegetative growth: Apply liquid balanced fertilizer every 2–3 weeks.
Once flowers appear: Switch to a lower-nitrogen, higher-potassium fertilizer (like 5-10-10 or a “tomato food”). Too much nitrogen at this stage produces lush leaves but poor fruit set.
Calcium: As with tomatoes, calcium deficiency causes blossom-end rot in peppers. Use calcium-containing fertilizers or add lime to the soil at planting.
Getting More Peppers: Key Tips
Be patient: Peppers are slow. Your plants may look small and unimpressive for the first 4–6 weeks. They’ll accelerate as heat accumulates.
Pinch early flowers: Many experienced growers pinch off the first 1–3 flowers when plants are young (under 12 inches). This diverts energy to root and stem development, producing a stronger plant that sets more fruit later. This is optional but often increases total yield.
Let some go to full color: Green peppers are fine to eat but picked early. Letting peppers fully ripen to red, yellow, or orange increases sweetness significantly. The tradeoff: fewer total peppers per season (each pepper takes the plant’s resources for longer).
Stake or cage plants: Full-sized pepper plants can become quite large and top-heavy when loaded with fruit. Provide a stake or small cage to prevent breakage.
Don’t move plants: Peppers are sensitive to root disturbance. Plant in their final location and don’t transplant again.
Common Bell Pepper Problems
Flower drop without fruit: Usually caused by temperature extremes (too hot above 90°F or too cold below 55°F), inconsistent watering, or excessive nitrogen. Be patient; fruiting often resumes when conditions normalize.
Blossom-end rot: Dark, sunken spots on the fruit bottom. Caused by calcium deficiency, typically exacerbated by irregular watering. Fix: consistent watering + calcium spray (Blossom-End Rot spray available at garden centers) + soil amendment with lime.
Sunscald: Bleached, white patches on pepper skin facing the sun. Protect with row cover fabric during intense heat waves.
Pepper maggots: Small white larvae inside the fruit. Prevention: row cover; insecticide application at egg-laying time. Inspect fruit regularly.
Aphids: Common pest on peppers. Knock off with water spray; insecticidal soap for persistent infestations.
Bacterial leaf spot: Water-soaked lesions on leaves; common in wet seasons. Apply copper fungicide preventively; avoid overhead watering.
When and How to Harvest
Green peppers: Harvest once pepper reaches full size and feels firm. Color is dark green, bright, and glossy.
Colored peppers: Wait an additional 2–4 weeks after reaching full size for the pepper to develop full color (red, yellow, orange). The sugars increase significantly during this time.
How to harvest: Cut with scissors or pruning shears, leaving a short stem on the pepper. Pulling by hand can break branches on heavy plants.
Harvesting extends production: Regular harvesting encourages more fruit set. Remove all mature fruit even if you can’t eat it all (compost it or give it away).
End of season: Before the first frost, harvest all peppers—even green ones. Unripe peppers can ripen on the counter at room temperature. You can also dig up pepper plants, pot them, and overwinter them indoors as houseplants—they’ll have a head start the following spring.
Bell peppers require more patience than most garden vegetables, but the reward of picking a sweet, colorful pepper grown by your own hand makes the wait worthwhile. They share many of the same care requirements as tomatoes, so growing both together is a natural pairing.